![First ASP.NET Core Microservice with Web API CRUD Operations on a MongoDB database [Clean Architecture] First ASP.NET Core Microservice with Web API CRUD Operations on a MongoDB database [Clean Architecture]](https://www.hosting.work/wp-content/uploads/2021/04/microservice-aspnet-core-web-api-crud-mongodb.png)
In this tutorial we will build our first Microservice in ASP.NET Core which will perform CRUD operations on a MongoDB database. The CRUD operations will be performed though a Web API method. This Microservice will form a part of a drone pizza delivery application.
Page Contents
In this series of tutorials, I will be building a complete Drone Pizza Delivery Application in Microservices Architecture. There will be a total of 2 microservices, the first one will be the CommandCenter microservice which will take pizza order. The second microservice will be the ProcessCenter which will manage the delivery of Pizzas through drones.
You can find the complete Source Code at my GitHub Repository.

In this tutorial I will build the first microservice i.e. CommandCenter microservice and on the next tutorial I will build the second microservice i.e. ProcessCenter microservice.
After this, I will be adding inter-communication between the microservices with RabbitMQ messaging broker and will create the full drone pizza delivery application in Microservices architecture
A Microservice is an architecture where your application is divided into various components, and these components serves a particular purpose. These components are collectively termed as Microservices.
Take for example an e-commerce application can have 3 Microservices:
The Microservices need to be independent from other Microservices so that they can run even if other microservices are down. Take for example the Order microservice should run even if the Product and Customer microservices are down. Similarly, this should be the case for the Product and Customer microservices. Each microservice can have it’s own dedicated Databases and the microservice can be hosted separately on different Servers.
Check the microservice architecture diagram given below:
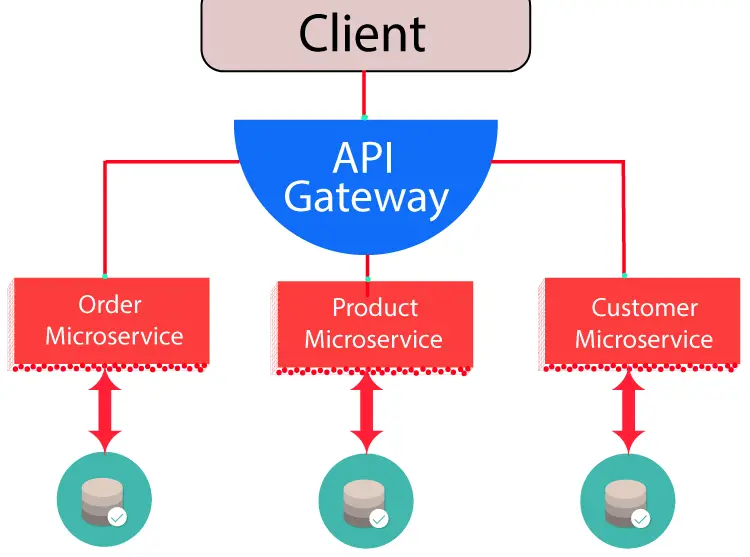
The main characteristics of Microservices are:
Monolith architecture is a traditional way of building applications where the services are tightly coupled with one another. Although monolith is ok for building small to mid-level applications but when you need to scale up the app the real problem starts.
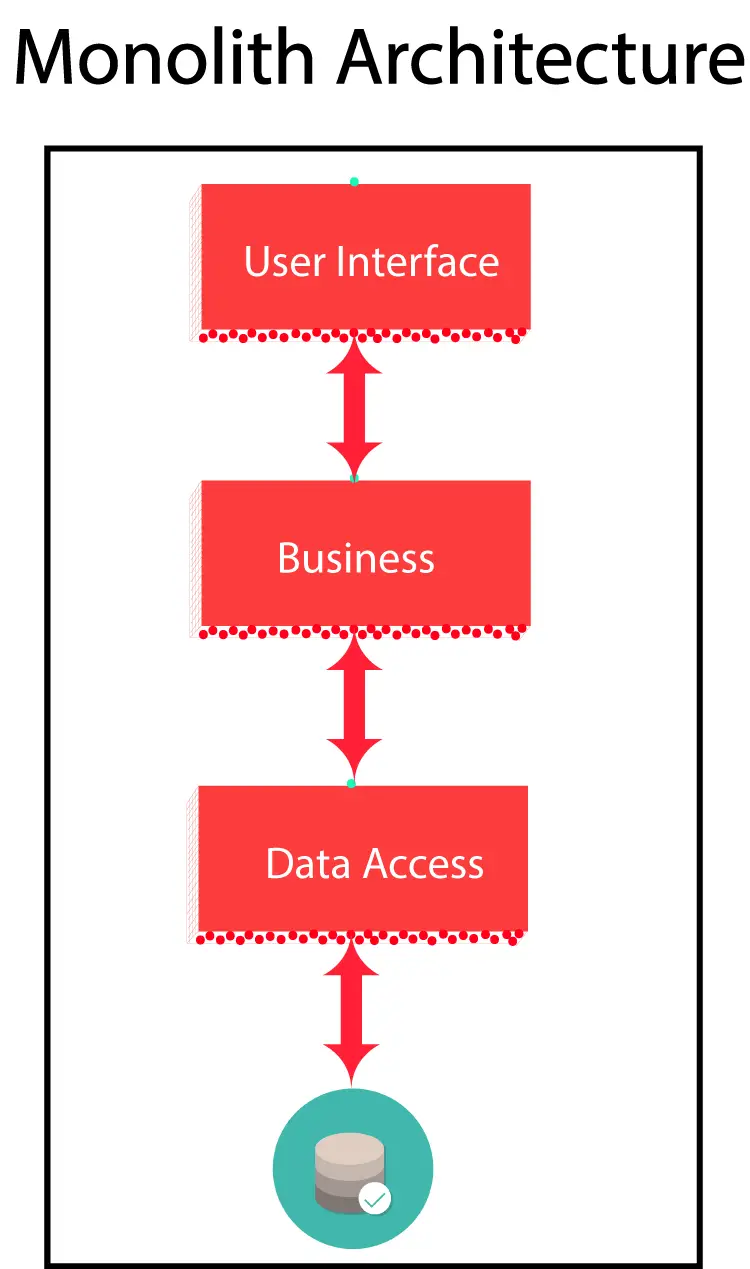
Characteristics of Monolith architecture are:
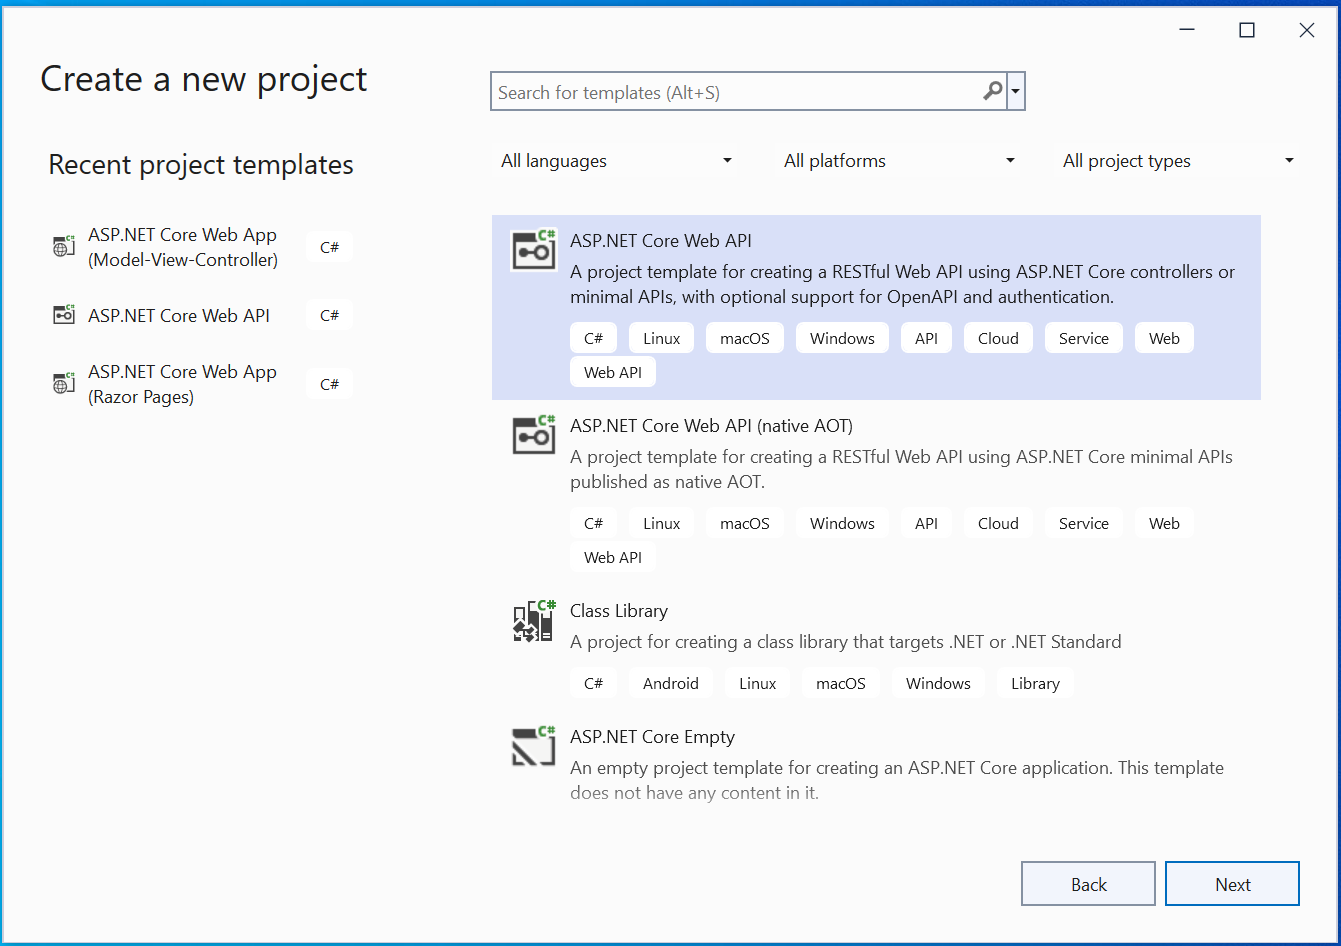
First open Visual Studio and create a new ASP.NET Core Web API project.
Give your app the name CommandCenter.
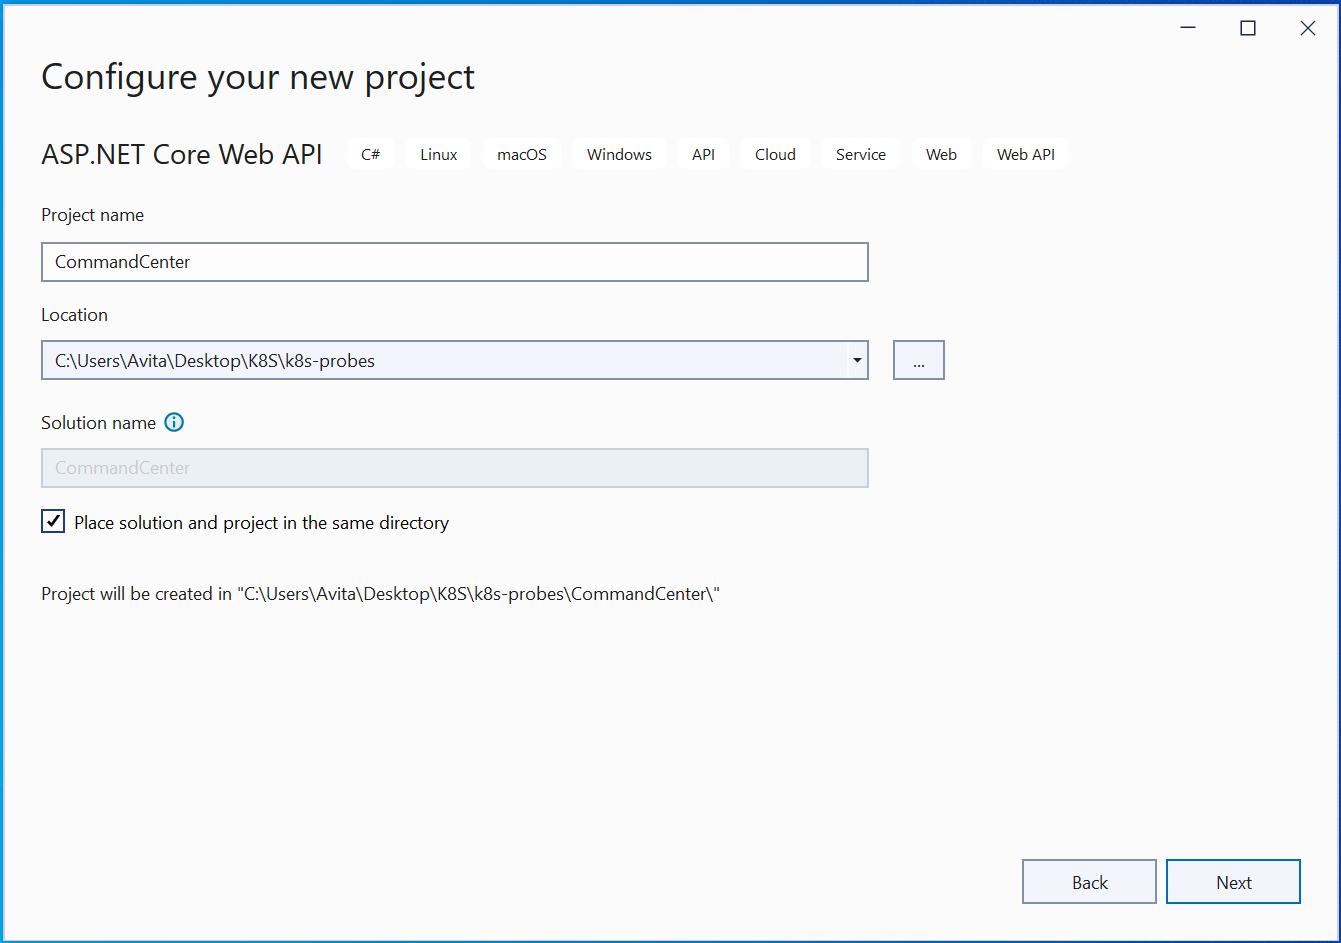
Click the Next butoon.
Select the latest version of .NET which is 8.0 right now. Also select Enable OpenAPI support to add Swagger. We will use Swagger in the latter part of this tutorial for performing CRUD operations.
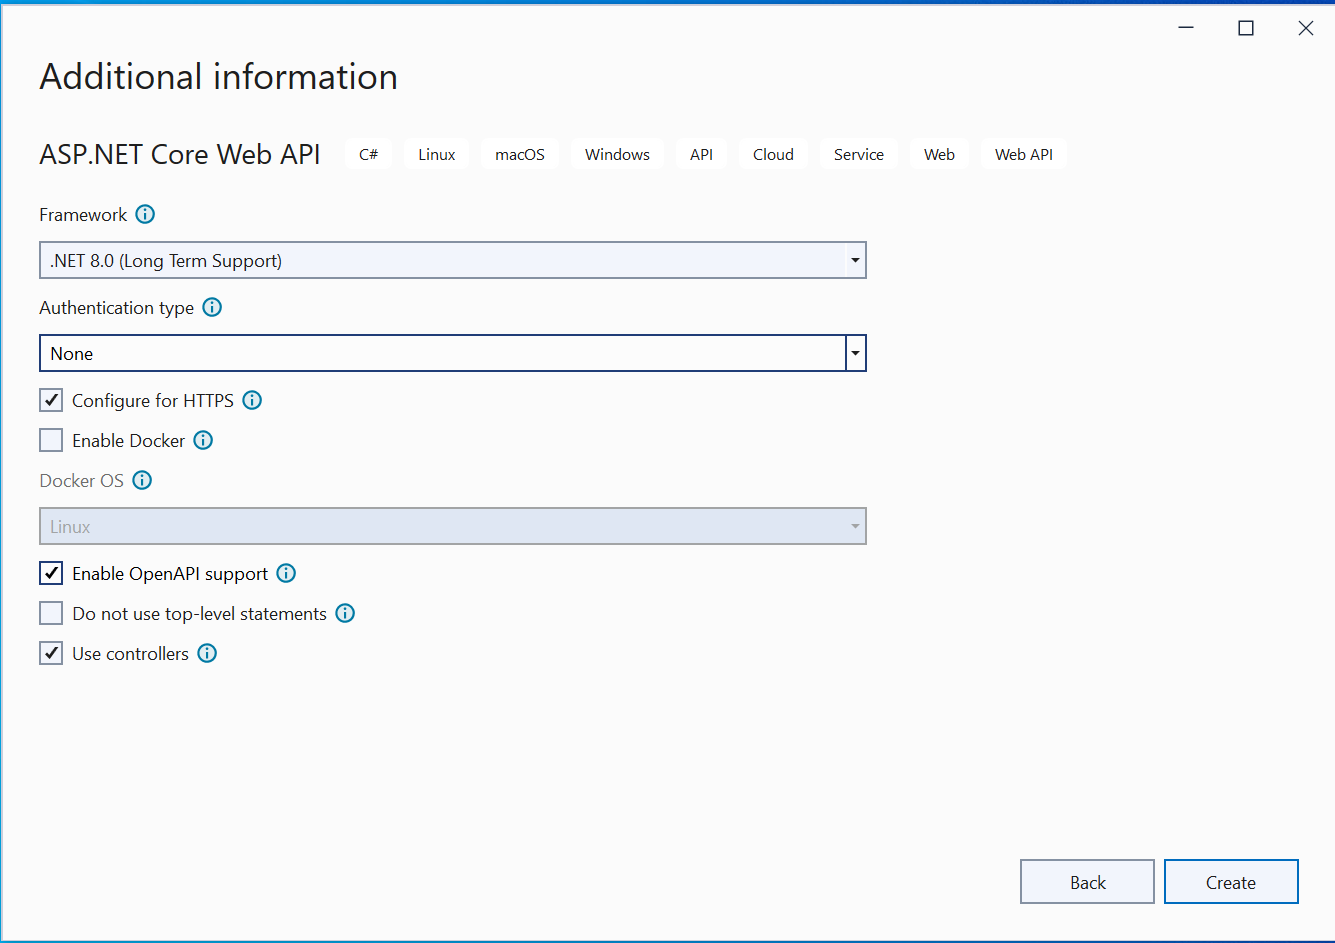
Next, click the Create button to create this microservice.
Our microservice will deal with Pizza Orders that will be stored in a MongoDB database. There will be only 4 fields for the pizza order. These are:
So, create a new folder called Entity on the root of the project and inside it, create a new class called IEntity.cs, This class will contain an interface called IEntity. It’s full code is given below:
namespace CommandCenter.Entity
{
    public interface IEntity
    {
        Guid Id { get; set; }
    }
}
To the same Entity folder create another new class called Order.cs. It is shown below:
namespace CommandCenter.Entity
{
    public class Order : IEntity
    {
        public Guid Id { get; set; }
        public string Address { get; set; }
        public int Quantity { get; set; }
        public DateTimeOffset CreatedDate { get; set; }
    }
}
The class derives from IEntity interface.
Next add a class called IRepository.cs inside the same Entity folder. Here define an interface called IRepository<T> where T should implements IEntity interface we defined previously. The full code is given below.
using System.Linq.Expressions;

namespace CommandCenter.Entity
{
    public interface IRepository<T> where T : IEntity
    {
        Task CreateAsync(T entity);
        Task<IReadOnlyCollection<T>> GetAllAsync();
        Task<IReadOnlyCollection<T>> GetAllAsync(Expression<Func<T, bool>> filter);
        Task<T> GetAsync(Guid id);
        Task<T> GetAsync(Expression<Func<T, bool>> filter);
        Task RemoveAsync(Guid id);
        Task UpdateAsync(T entity);
    }
}
The IRepository is a generic interface, a class that needs to implement is, must also implement IEntity interface.
The IRepository interface contains methods for performing CRUD operations over MongoDB database.
The use of Func delegate is for filtering of records from the database. For example – Expression<Func<T, bool>> filter mean we can provide a function that accepts a T type of parameter and returns a bool value. We already know that T is of IEntity type.
Create a new folder called Infrastructure on the root folder of the project and create a new class called Dtos.cs. It’s code is given below:
using System.ComponentModel.DataAnnotations;

namespace CommandCenter.Infrastructure
{
    public record OrderDto(Guid Id, string Address, int Quantity, DateTimeOffset CreatedDate);
    public record CreateOrderDto([Required] string Address, [Range(0, 1000)] int Quantity);
    public record UpdateOrderDto([Required] string Address, [Range(0, 1000)] int Quantity);
}
This class has 3 Data Transfer objects aka Dtos. Note that Dtos are only used to pass data between layers and does not contain any business logic. I will be using them in the Web API shortly. I have used record type for the Dtos instead of class as they are faster to work with and their value cannot be changed later on.
Next, to the same Infrastructure folder, add a new class called Extensions.cs which will create an extension method for the “Order” type, and will be used to convert Order type value to OrderDto type. Remember “OrderDto” is the Dto we previously defined.
The OrderDto.cs code is given below:
using CommandCenter.Entity;

namespace CommandCenter.Infrastructure
{
    public static class Extensions
    {
        public static OrderDto AsDto(this Order order)
        {
            return new OrderDto(order.Id, order.Address, order.Quantity, order.CreatedDate);
        }
    }
}
Now I will configure MongoDB settings so that the ASP.NET Core application can connect to it and also perform CRUD operations.
First, in the appsettings.json file, add 2 sections called “ServiceSettings” and “MongoDbSettings” as highlighted below.
{
  "Logging": {
    "LogLevel": {
      "Default": "Information",
      "Microsoft": "Warning",
      "Microsoft.Hosting.Lifetime": "Information"
    }
  },
  "ServiceSettings": {
    "ServiceName": "Order"
  },
  "MongoDbSettings": {
    "Host": "localhost",
    "Port": "27017"
  },
  "AllowedHosts": "*"
}
The ServiceName specifies the MongoDB database name which is called Order. The MongoDbSettings specifies the host and port of the MongoDB database and these will be used to create the connection string in-order to connect with the MongoDb database.
Next, it’s time to create the necessary classes for these MongoDB values defined in the appsettings.json file.
So, create a new folder called Setting on the root of the project and create 2 classes called MongoDbSettings.cs and ServiceSettings.cs to it.
The code of MongoDbSettings.cs class is:
namespace CommandCenter.Setting
{
    public class MongoDbSettings
    {
        public string Host { get; init; }
        public string Port { get; init; }
        public string ConnectionString => $"mongodb://{Host}:{Port}";
    }
}
The code of ServiceSettings.cs class is:
namespace CommandCenter.Setting
{
    public class ServiceSettings
    {
        public string ServiceName { get; init; }
    }
}
Now it’s time to create repository which will directly communicate with the MongoDB database. So, create a new folder called MongoDB on the root of the project and add a new class called MongoRepository.cs to it. This class inherits from IRepository<T> class. So we have to implement every method of the IRepository interface.
The full code of MongoRepository.cs is given below:
using CommandCenter.Entity;
using MongoDB.Driver;
using System.Linq.Expressions;

namespace CommandCenter.MongoDB
{
    public class MongoRepository<T> : IRepository<T> where T : IEntity
    {
        private readonly IMongoCollection<T> collection;
        private readonly FilterDefinitionBuilder<T> filterBuilder = Builders<T>.Filter;

        public MongoRepository(IMongoDatabase database, string collectionName)
        {
            collection = database.GetCollection<T>(collectionName);
        }

        public async Task<IReadOnlyCollection<T>> GetAllAsync()
        {
            return await collection.Find(filterBuilder.Empty).ToListAsync();
        }

        public async Task<IReadOnlyCollection<T>> GetAllAsync(Expression<Func<T, bool>> filter)
        {
            return await collection.Find(filter).ToListAsync();
        }

        public async Task<T> GetAsync(Guid id)
        {
            FilterDefinition<T> filter = filterBuilder.Eq(e => e.Id, id);
            return await collection.Find(filter).FirstOrDefaultAsync();
        }

        public async Task<T> GetAsync(Expression<Func<T, bool>> filter)
        {
            return await collection.Find(filter).FirstOrDefaultAsync();
        }

        public async Task CreateAsync(T entity)
        {
            if (entity == null)
            {
                throw new ArgumentNullException(nameof(entity));
            }
            await collection.InsertOneAsync(entity);
        }

        public async Task UpdateAsync(T entity)
        {
            if (entity == null)
            {
                throw new ArgumentNullException(nameof(entity));
            }
            FilterDefinition<T> filter = filterBuilder.Eq(e => e.Id, entity.Id);
            await collection.ReplaceOneAsync(filter, entity);
        }

        public async Task RemoveAsync(Guid id)
        {
            FilterDefinition<T> filter = filterBuilder.Eq(e => e.Id, id);
            await collection.DeleteOneAsync(filter);
        }
    }
}
We will require to have drivers for MongoDB installed in the project. This can be done by adding the MongoDB.Driver package from NuGet.
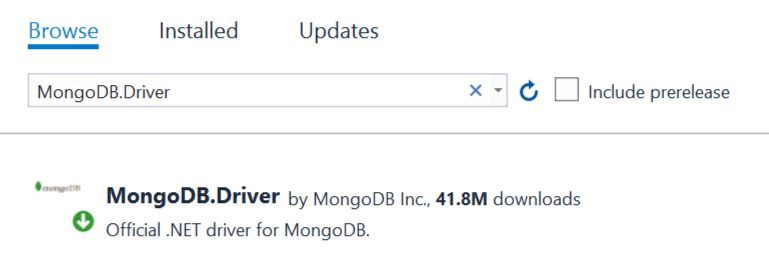
Take a look to this class code. It has method for performing CRUD operations.
Now I will create extension methods for IServiceCollection type. I will then call these extension methods from the Program.cs class. These methods will create singleton objects for MongoRepository<T> type and provide it with the necessary MongoDB database configurations.
So, create Extensions.cs class to the same MongoDB folder with the following code:
using CommandCenter.Entity;
using CommandCenter.Setting;
using MongoDB.Bson.Serialization.Serializers;
using MongoDB.Bson.Serialization;
using MongoDB.Bson;
using MongoDB.Driver;

namespace CommandCenter.MongoDB
{
    public static class Extensions
    {
        public static IServiceCollection AddMongo(this IServiceCollection services)
        {
            BsonSerializer.RegisterSerializer(new GuidSerializer(BsonType.String));
            BsonSerializer.RegisterSerializer(new DateTimeOffsetSerializer(BsonType.String));
            services.AddSingleton(a =>
            {
                var configuration = a.GetService<IConfiguration>();
                var serviceSettings = configuration.GetSection(nameof(ServiceSettings)).Get<ServiceSettings>();
                var mongoDbSettings = configuration.GetSection(nameof(MongoDbSettings)).Get<MongoDbSettings>();
                var mongoClient = new MongoClient(mongoDbSettings.ConnectionString);
                return mongoClient.GetDatabase(serviceSettings.ServiceName);
            });
            return services;
        }

        public static IServiceCollection AddMongoRepository<T>(this IServiceCollection services, string collectionName) where T : IEntity
        {
            services.AddSingleton<IRepository<T>>(a =>
            {
                var database = a.GetService<IMongoDatabase>();
                return new MongoRepository<T>(database, collectionName);
            });
            return services;
        }
    }
}
There are 2 methods in this file:
1. AddSingleton – where I am fetching the MongoDB values from the appsettings.json file and adding a singleton service that will contain these values. I am also serializing the guid and datetime values with BsonSerializer class.
2. AddMongoRepository – here I will be providing through dependency injection a singleton object of MongoRepository<T> whenever IRepository<T> object is requested. In the API Controller (which we will build shortly), we will be using IRepository<T> object for performing CRUD operations. The dependency injection will provide us with MongoRepository<T> object that will be filled with the data from the database. This is all due to this method.
Now, we will need to register these methods in the Program.cs class. So add the highlighted code given below on the Program.cs class.
using CommandCenter.Entity;
using CommandCenter.MongoDB;

var builder = WebApplication.CreateBuilder(args);

// Add services to the container.
builder.Services.AddMongo().AddMongoRepository<Order>("pizzaItems");
builder.Services.AddControllers(options =>
{
    options.SuppressAsyncSuffixInActionNames = false;
});

// Learn more about configuring Swagger/OpenAPI at https://aka.ms/aspnetcore/swashbuckle
builder.Services.AddEndpointsApiExplorer();
builder.Services.AddSwaggerGen();

var app = builder.Build();

// Configure the HTTP request pipeline.
if (app.Environment.IsDevelopment())
{
    app.UseSwagger();
    app.UseSwaggerUI();
}

app.UseHttpsRedirection();

app.UseAuthorization();

app.MapControllers();

app.Run();
Note that pizzaItems will be the collection name for the MongoDB database.
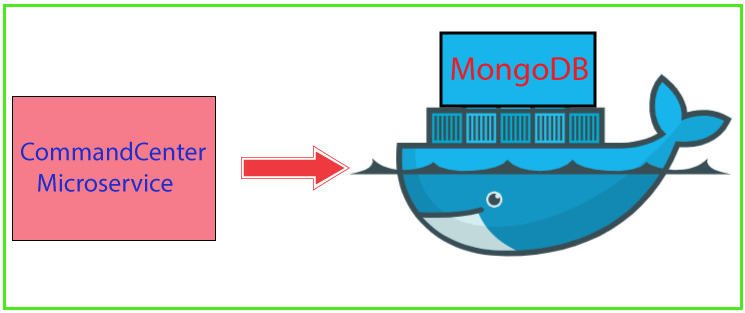
Docker containers are widely used in Microservices architecture and they can be used to run certain components of the Microservice. I decided to run my MongoDB database from a docker container. If you don’t want this approach then install MongoDB Community Server on your PC and change the Host and Port values in the appsettings.json file.
The default port of MongoDB running on the docker container is 27017. I have already specified this value in the appsettings.json file.
You will need to have docker desktop installed on your pc. You can download it from here. Once installed you will see docker desktop icon in your task bar, right click on it and select Restart Docker option.
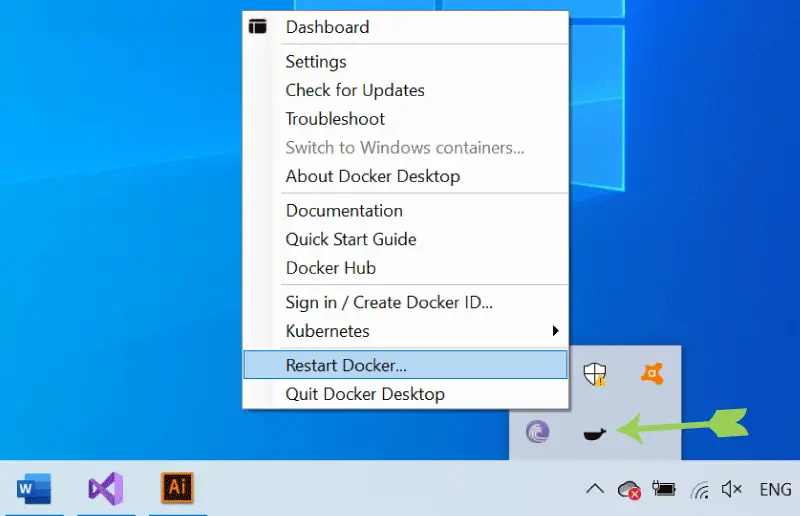
Now create a yaml file which contains the MongoDB docker container name, image, port number and volumes. The code of this file is given below.
version: "3.8"
services:
  mongo:
    image: mongo
    container_name: mongo
    ports:
      - 27017:27017
    volumes:
      - mongodbdata:/data/db
volumes:
  mongodbdata:
You will find this file by the name of docker-compose.yaml in the source code also.
Open the command prompt and navigate to the directory of this file and run the following command.
docker-compose up -d
This will run a docker container with MongoDB image.

Our MongoDB is now running inside a docker container.
Now we have come to the final part of this tutorial where I will create a Web API that will perform CRUD operations for the pizza orders. So add a new controller called OrderController.cs inside the Controllers folder. Add the following code to it:
using CommandCenter.Entity;
using CommandCenter.Infrastructure;
using Microsoft.AspNetCore.Mvc;

namespace CommandCenter.Controllers
{
    [ApiController]
    [Route("order")]
    public class OrderController : ControllerBase
    {
        private readonly IRepository<Order> repository;
        public OrderController(IRepository<Order> repository)
        {
            this.repository = repository;
        }

        [HttpGet]
        public async Task<ActionResult<IEnumerable<OrderDto>>> GetAsync()
        {
            var items = (await repository.GetAllAsync()).Select(a => a.AsDto());
            return Ok(items);
        }

        [HttpGet("{id}")]
        public async Task<ActionResult<OrderDto>> GetByIdAsync(Guid id)
        {
            var item = await repository.GetAsync(id);
            if (item == null)
            {
                NotFound();
            }
            return item.AsDto();
        }

        [HttpPost]
        public async Task<ActionResult<OrderDto>> PostAsync(CreateOrderDto createOrderDto)
        {
            var order = new Order
            {
                Address = createOrderDto.Address,
                Quantity = createOrderDto.Quantity,
                CreatedDate = DateTimeOffset.UtcNow,
            };
            await repository.CreateAsync(order);
            return CreatedAtAction(nameof(GetByIdAsync), new { id = order.Id }, order);
        }

        [HttpPut("{id}")]
        public async Task<IActionResult> PutAsync(Guid id, UpdateOrderDto updateItemDto)
        {
            var existingOrder = await repository.GetAsync(id);
            if (existingOrder == null)
            {
                return NotFound();
            }
            existingOrder.Address = updateItemDto.Address;
            existingOrder.Quantity = updateItemDto.Quantity;
            await repository.UpdateAsync(existingOrder);
            return NoContent();
        }

        [HttpDelete("{id}")]
        public async Task<IActionResult> DeleteAsync(Guid id)
        {
            var item = await repository.GetAsync(id);
            if (item == null)
            {
                return NotFound();
            }
            await repository.RemoveAsync(item.Id);
            return NoContent();
        }
    }
}
Few things to note here:
The controller has Web API methods to handle the HttpGet, HttpPost HttpPut and HttpDelete types of requests. In order to test these methods, we will need to install Swagger to our project.
Swagger is the most widely used tooling ecosystem for developing APIs. Since we selected Enable OpenAPI support during project creation therefore Swagger will be automatically installed.
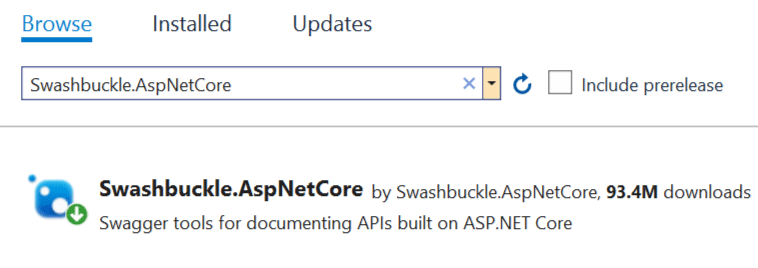
If you have not selected enable OpenAPI support then you need to install Swagger manually. For this add package called Swashbuckle.AspNetCore from NuGet. It provides Swagger tools for documenting APIs built on ASP.NET Core.
Next open the Program.cs class and add the needed swagger codes as shown below:
using CommandCenter.Entity;
using CommandCenter.MongoDB;

var builder = WebApplication.CreateBuilder(args);

// Add services to the container.
builder.Services.AddMongo().AddMongoRepository<Order>("pizzaItems");
builder.Services.AddControllers(options =>
{
    options.SuppressAsyncSuffixInActionNames = false;
});

// Learn more about configuring Swagger/OpenAPI at https://aka.ms/aspnetcore/swashbuckle
builder.Services.AddEndpointsApiExplorer();
builder.Services.AddSwaggerGen();

var app = builder.Build();

// Configure the HTTP request pipeline.
if (app.Environment.IsDevelopment())
{
    app.UseSwagger();
    app.UseSwaggerUI();
}

app.UseHttpsRedirection();

app.UseAuthorization();

app.MapControllers();

app.Run();
Now run your project and you will see the swagger page displayed on the browser.
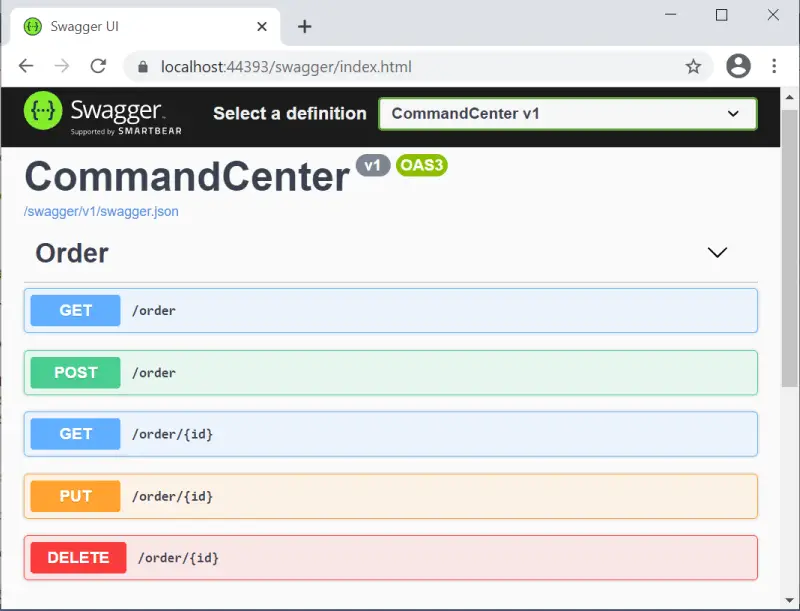
Now let us test these web api methods one by one with swagger.
The PostAsync() method creates a new order in the MongoDB database. It receives CreateOrderDto record type in it’s parameter and returns CreatedAtAction method with the created order and it’s location uri.
[HttpPost]
public async Task<ActionResult<OrderDto>> PostAsync(CreateOrderDto createOrderDto)
{
    var order = new Order
    {
        Address = createOrderDto.Address,
        Quantity = createOrderDto.Quantity,
        CreatedDate = DateTimeOffset.UtcNow,
    };
    await repository.CreateAsync(order);
    return CreatedAtAction(nameof(GetByIdAsync), new { id = order.Id }, order);
}
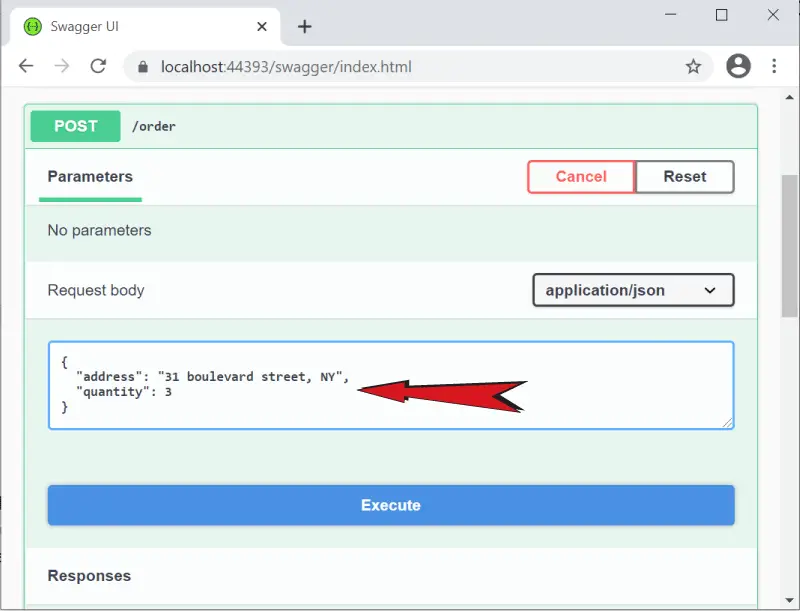
In the swagger page, click the “POST” button and click the Try it out button. Then on the request body box, enter the address and quantity value to the JSON (like what I did in the image given below). Next click the Execute button.
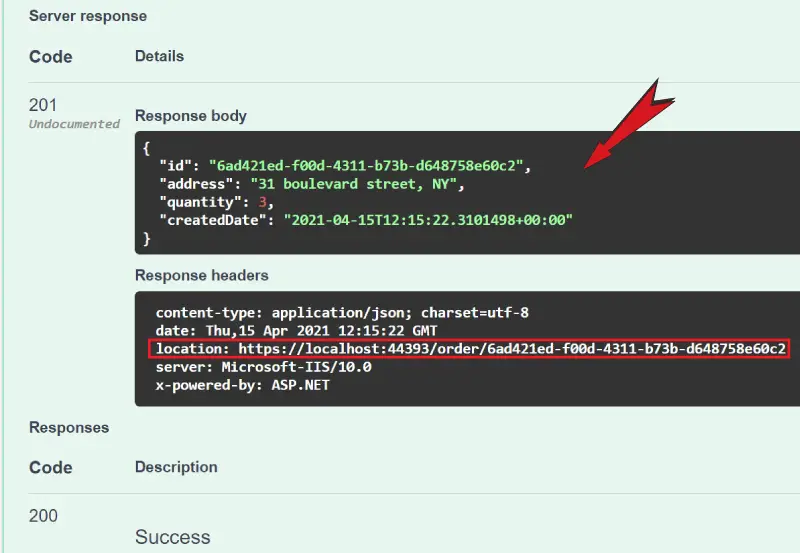
The order will be created and on the response body the order is shown in json format. On the response headers there is a location field which contains the uri of this order like https://localhost:44393/order/Order_id. The CreatedAtAction which we returned from the method adds location field on the response headers.
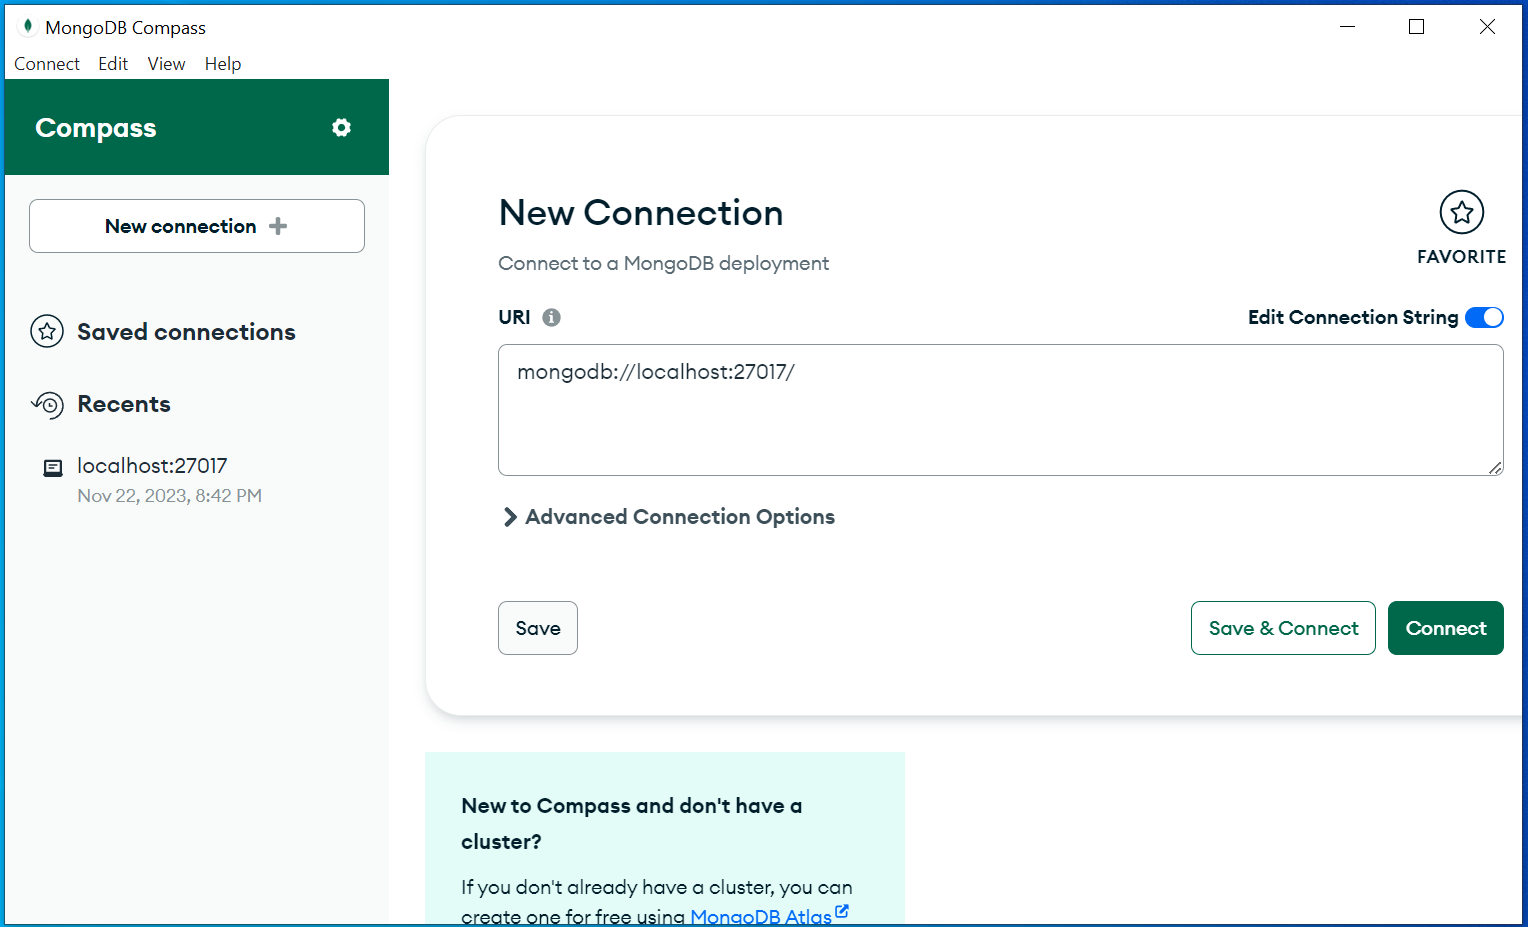
In compass the connection string will be auto filled. Simply click the Connect button to connect with the MongoDB running on the Docker Container.
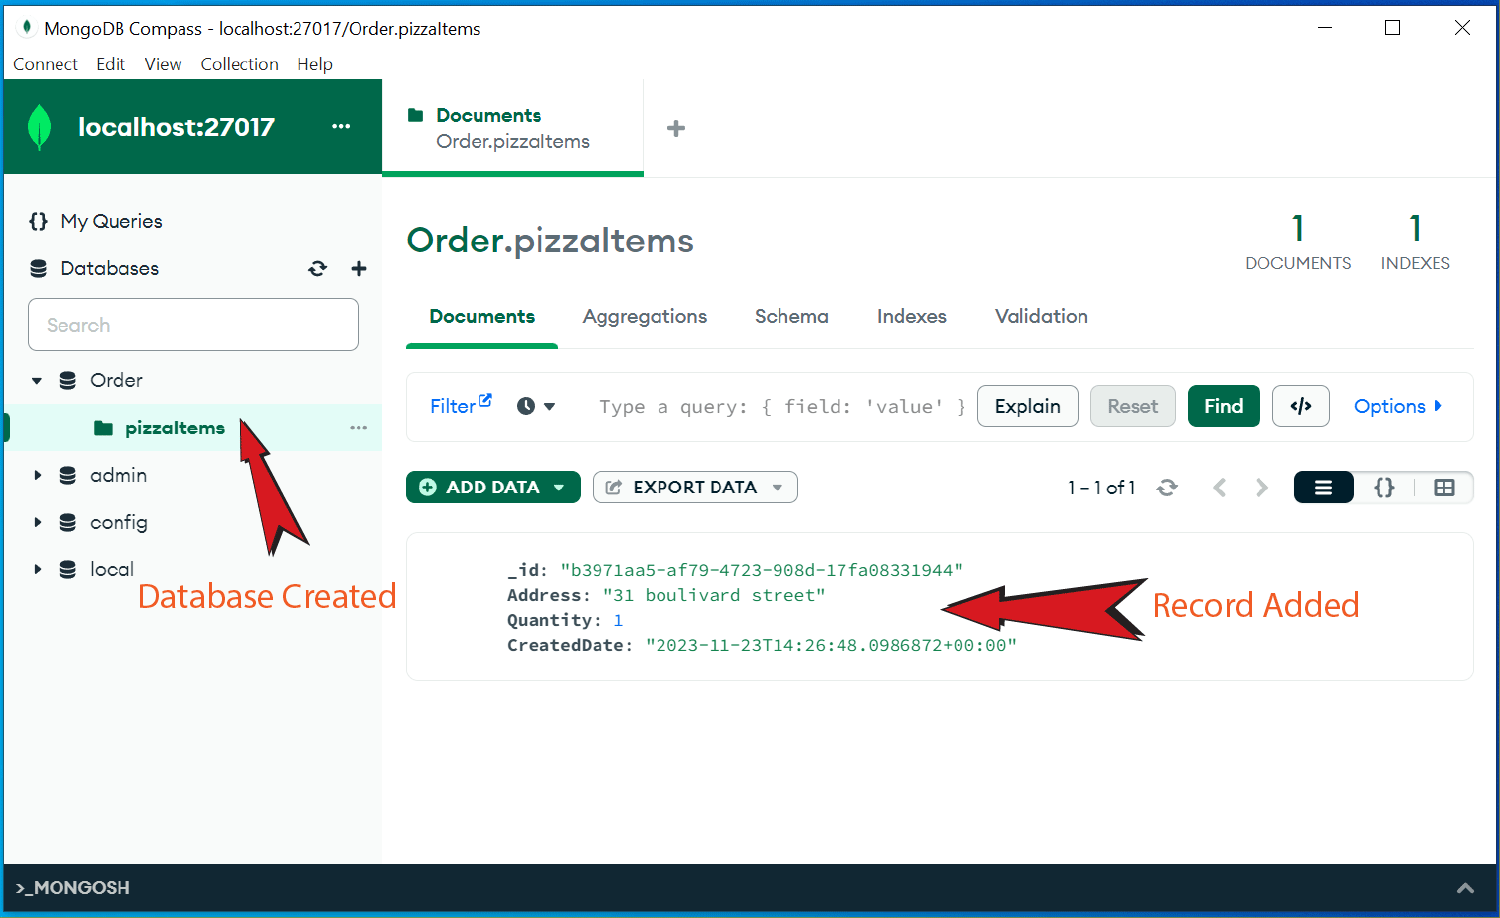
You will now see your “Order” database is created. Click it’s arrow to see the collection called pizzaItems. Now click the pizzaItems to see the newly created order record which you just created. See the below image.
The GetAsync() method returns all the order in the MongoDB database.
[HttpGet]
public async Task<ActionResult<IEnumerable<OrderDto>>> GetAsync()
{
    var items = (await repository.GetAllAsync()).Select(a => a.AsDto());
    return Ok(items);
}
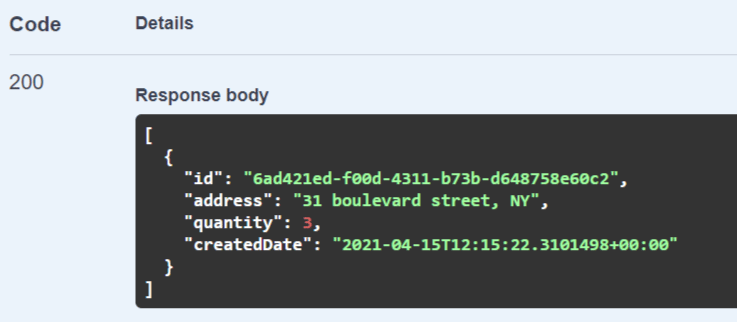
In the swagger page click the GET button then click the Try it out button, and after this click the Execute button. This will execute this method, on the response body you will see all the orders in json.
The GetByIdAsync() method of the API gives the order json when you provide the order id.
[HttpGet("{id}")]
public async Task<ActionResult<OrderDto>> GetByIdAsync(Guid id)
{
    var item = await repository.GetAsync(id);
    if (item == null)
    {
        NotFound();
    }
    return item.AsDto();
}
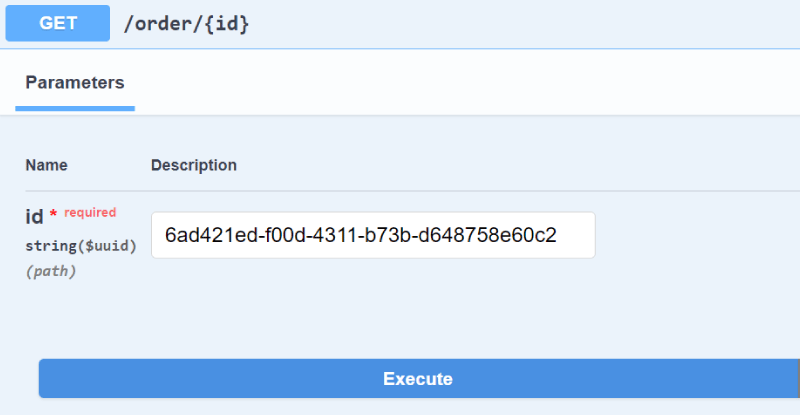
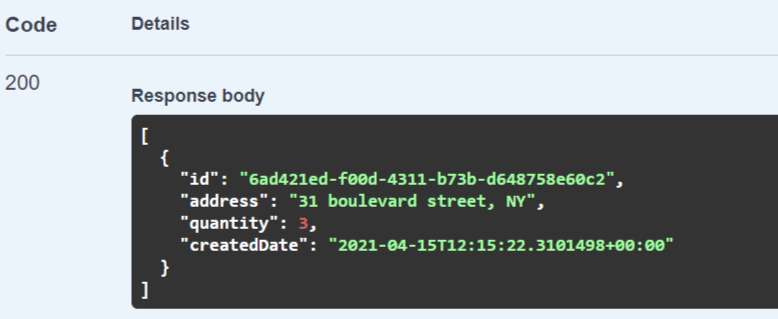
In the swagger page click the GET button that has the text /order/{id} written next to it. Enter the order id and click Execute button (get the Order Id by clicking the first GET button which has /order text written next to it).
In the response body you will see the order in json.
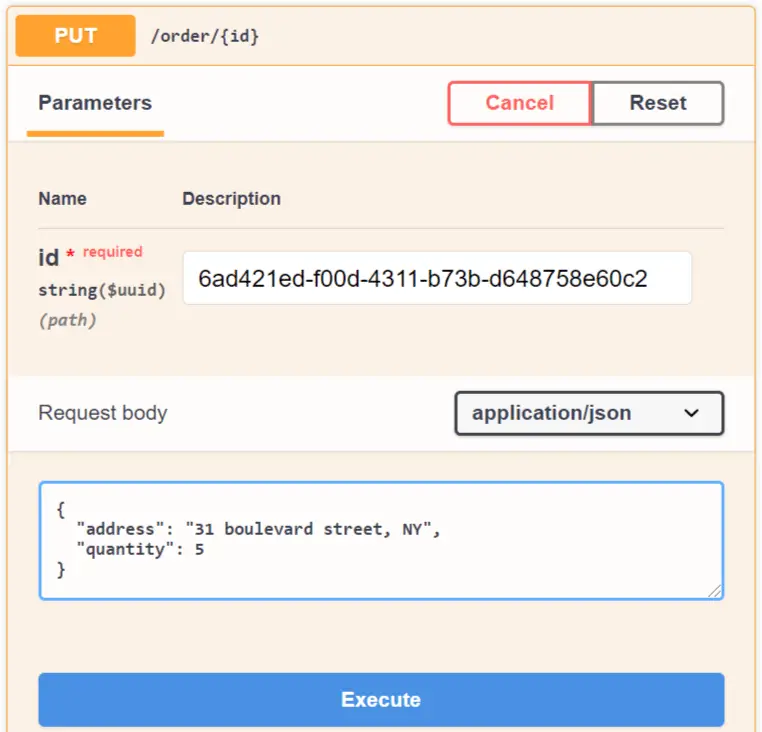
The PutAsync() method is used for updating an order.
[HttpPut("{id}")]
public async Task<IActionResult> PutAsync(Guid id, UpdateOrderDto updateItemDto)
{
    var existingOrder = await repository.GetAsync(id);
    if (existingOrder == null)
    {
        return NotFound();
    }
    existingOrder.Address = updateItemDto.Address;
    existingOrder.Quantity = updateItemDto.Quantity;
    await repository.UpdateAsync(existingOrder);
    return NoContent();
}
In the swagger page click the PUT button and enter the order id to the Id field. Then on the request body JSON enter the new value for the order. In the below image I have changed the quantity to 5, so when I execute this method the quantity will be updated from 3 to 5.
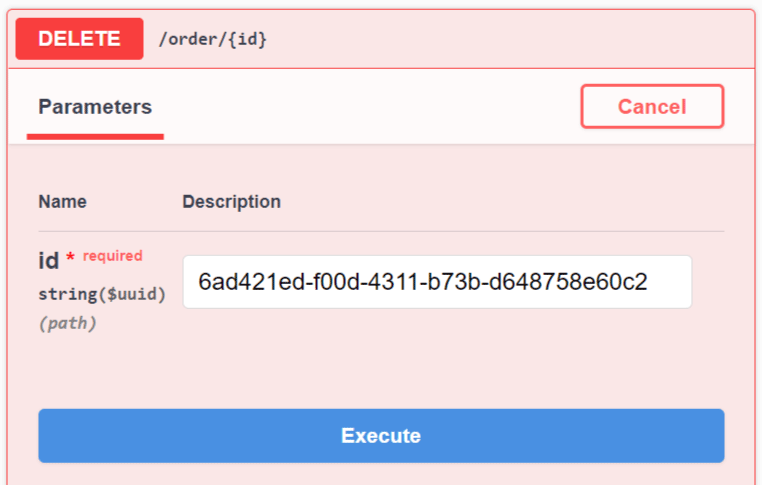
The DeleteAsync() method deletes an order from the MongoDB database. It accepts the order id to be deleted on it’s parameter.
[HttpDelete("{id}")]
public async Task<IActionResult> DeleteAsync(Guid id)
{
    var item = await repository.GetAsync(id);
    if (item == null)
    {
        return NotFound();
    }
    await repository.RemoveAsync(item.Id);
    return NoContent();
}
In the swagger page click the Delete button then enter the order id and click Execute. This will delete the order from the database.
We have successfully created our First ASP.NET Core Microservices which performs Web API CRUD operations on a MongoDB database. On the next tutorial we will create our second microservice and perform communication with the first microservice.
SHARE THIS ARTICLE